Sunday, August 5, 2018

How to Draw Complex Folds and Ruffles in Fabric and Clothing

Hello everyone! Even though creating a character is hard, drawing out their elaborate clothing is even more difficult. Here's an article that can help. I hope you enjoy. Happy Reading!!!!!
by 
Difficulty:IntermediateLength:MediumLanguages:
Generally speaking, intricate designs all start with very simple shapes and are easy to create once you know how, but unless you know where to begin, it can prove to be challenging. This tutorial guides you through fabric movement and folds, continuing on to creating a few simple features of more intricate clothing design, which can then be used alongside each other to build up to a higher level of drawing clothing. This tutorial builds on the knowledge gained from my previous clothing tutorial, which was aimed at beginners.
When it comes to drawing fabric and clothing, the first thing you'll need to consider is fabric movement, and how it will fall over the curves of your character's figure. Before you start drawing any clothing, take a look at fabric around you - your own clothing, for example - and how that works and where it folds, and why. Below are a few examples, using my trusty green curtain, of how fabric folds, and the different shapes it makes, and where the light falls in 'normal' lighting.
The first example is of the curtain just being a curtain, and it falls and folds vertically, the folds created by the bunching at the top. This example is useful should you wish to consider drawing long flowing skirts, dresses or cloaks.
The fabric here is folded to fall in various directions, showing a great example of how lighting works with the various shadows and highlights within the shapes. These folds are more likely to be seen in an unmade bed than clothing, but could easily be incorporated into a more intricate design, such as a fantasy gown or wedding dress.
This twisted 'rose' of fabric makes for a good general reference as it has all-sorts of shapes within it, twisting around to the middle. This fabric shape as a whole is most likely to be found as a design itself, sewn into, or on something, like a prom dress.
Tightly bunched fabric like the top of a curtain is great to show an elastic seam, such as a skirt with an elasticated waist, or to show fabric gathered using, as an example, a thin piece of ribbon, which could be used in many places on clothing designs, such as sleeves.
When drawing clothing, it's best to start with the basic shapes and the anatomy of the design, as this will give you something to build on. To make sure your basic shape is symmetrical, you can draw half, duplicate and then flip it horizontally to create the other half. Even if your planned design isn't symmetrical, it's a good idea to start this way as you'll know everything will be level and in the right place before you begin.
You can download the basic dress shape below from the source files to use throughout this tutorial, in both PSD vector format and JPEG format.
Before adding to the basic shape, you'll need to know how to draw the additions that you may want to use in the design, starting with ruffles and frills. First, draw a curved line.
Underneath your line, and following its curve, add a wiggly line with similar shape to the one shown below.
Add further lines to act as the fabric that forms the ruffles pointing upwards.
Using straight connecting lines from the points of the lower ruffles toward the original curved line completes the frill look.
Erase any superfluous lines, such as those areas in the original curve which overlap the 'tops' of the ruffles.
Below are examples of other ideas and ruffle shapes for you to consider.
Buttons can come in all shapes and sizes, but they all follow the same sort of idea when it comes to drawing them. Start by drawing your button shape, in this case, a circle.
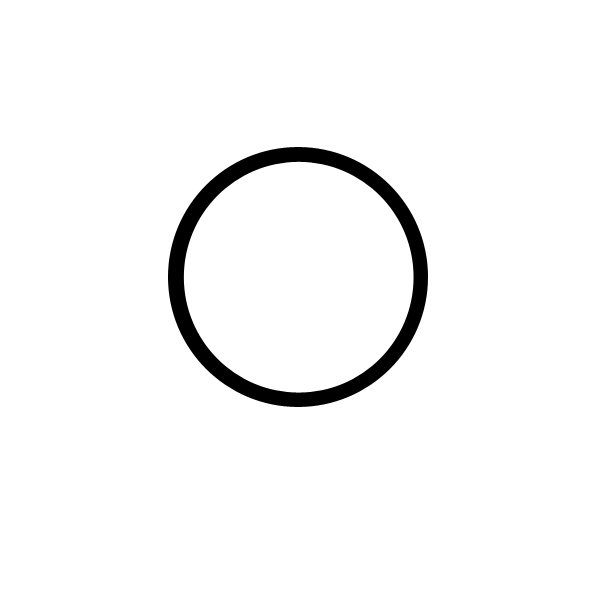
Many buttons have small holes in them, which is how they are sewn on to the garment. Some buttons have instead a small loops at the back to attach them, it depends on the style of the button. Drawing a vertical line like the one shown below gives the impression of the cotton between two of the small holes on the button, holding it in place. Experiment with different styles of buttons, and consider how they're attached to the clothing.
Add a second line, as shown below, for the other side. Unless your button design only features two holes (and therefore one piece of cotton to hold it in place, in the center) then you will need to do the same to the other side. You can duplicate your previous layer and move the duplication over to ensure they are the same.
Here another part of a circle has been added to the outside of the original button shape. This gives a 3D effect to the drawing, which is important to remember as buttons are not flat, they are 3-dimensional objects! You can change the placement of this rim around the edge to give different suggested viewing angles, and the placement here is for a frontal view.
Start by drawing a lemon shape similar to the one in the example below.
Add a base to it, which is the arm-hole of the sleeve.
Add a few creases, remembering to consider the direction and shape of the fabric.
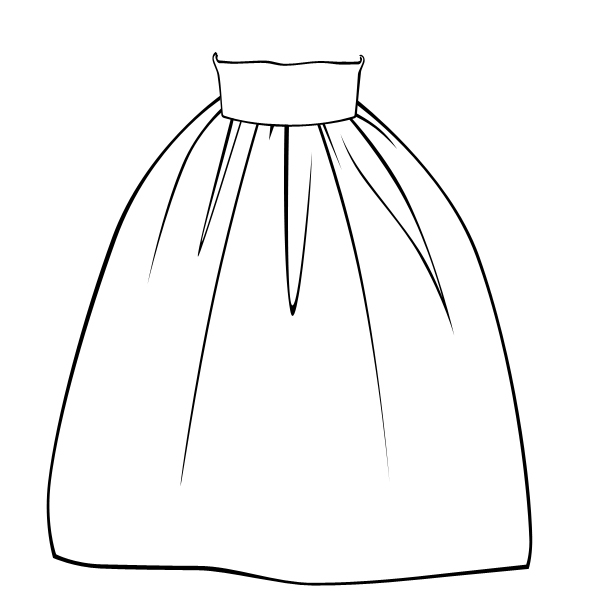
When drawing a skirt, the waistband is a good place to start. I've chosen to draw a thick waistband, which covers the whole space from the waist to just under the bust. When it comes to considering different waistband styles and how to draw them, looking at photos of wedding dresses will often show the widest range of ideas, and due to the fabric generally being white, all the folds are very easy to see.
Draw out the shape for the main body of the skirt.
Add your fabric folds.
You can then put all these different ideas together to create all sorts of different styles and designs. You could draw anything from beautiful and posh ball gowns, or smart and fashionable jackets, to an embellished olden day Victorian Maid style outfit as I have done, shown below.
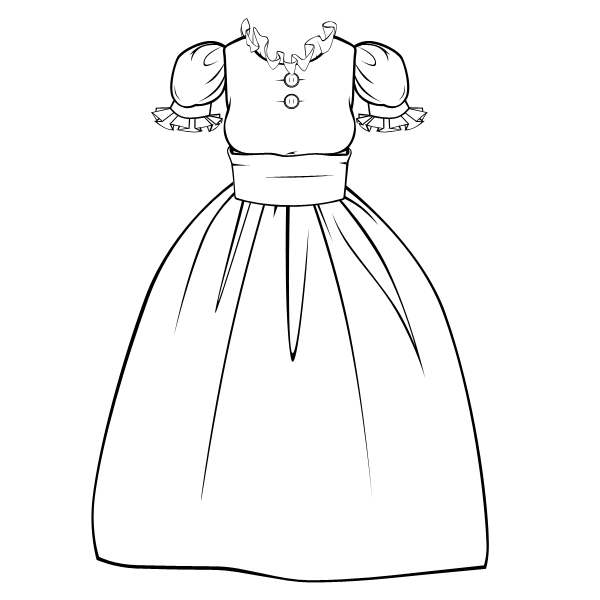
I've discussed other methods of adding color and shade in other tutorials I've written, so this section covers adding shade using the Multiply Layer Style, which is a fairly popular way of shading. I'm using grays for my shading, but experimenting with different colors will give different results when you come to add the base colors below, so try a few different colors to discover the result you're looking for. You'll need to choose a dark-medium tone, and add shade only to the very darkest parts, as shown on the neck ruffle below. Place your shading layers inside a Group Folder, and set the whole folder to 'Multiply' in the Layer Styles tab.
This is how the full design looks with the darkest shading layers added.
Next, choose a lighter tone to add the secondary shading. These layers will need to be added in another Group Folder, underneath the one for your darker shading. Again, set the folder to Multiply. Add this layer of shading as the mid-tones, so you'll need to leave the lightest parts unshaded, but shade the rest.
Here is the full design with the secondary shading.
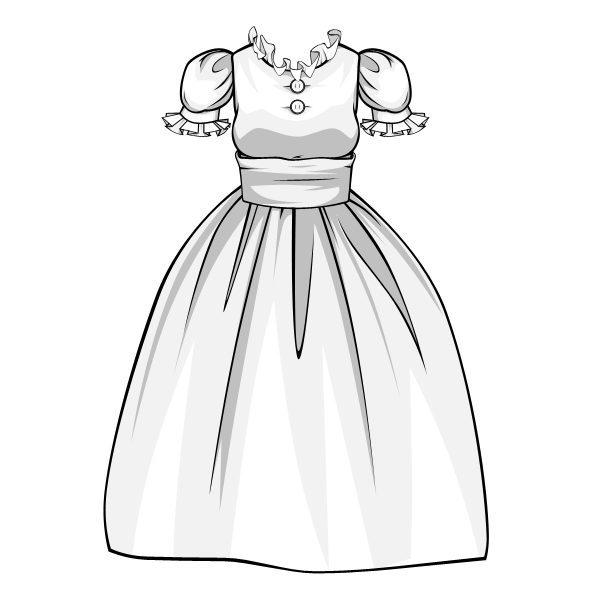
By using the Multiply method of shading, you can now add any colors underneath the shading layers, and the shading will be easily visible above, even if you were to use the same colors for the base color as you did for the shade. The example below shows how the different base colors react differently to the Multiply shading.
The example below shows the full Victorian-style maid outfit fully colored, with lilac and white embellishments.
By using this method of shading, it is easy to change the colors and therefore change the design and feel of the garment. Using this method of shading is useful when dealing with gradients, as shown, as the shading color will follow the base color.
Advertisement
Now you can experiment with different views and styles to come up with more fun and interesting clothing designs, and by using the Multiply method of shading, you can test the different colors for the shade to discover interesting results.
Clothing design is something where a lot of fun can be had, so give in to your imagination and enjoy the process! Don't forget to consider the movement of the fabric and where folds will fall, and remember that using real life references will be the most reliable resource when learning to draw clothing. As usual, please do show me anything you make which is inspired by this tutorial, I'd love to see.
Advertisement

Saturday, August 4, 2018

10 Tips And Tricks For Creating Memorable Characters

Hello everyone! how's summer so far? Great, I hope. I want to apologize for the late posts. As promised, I will post two articles this weekend and be sure to be on time next time; however, I will post send one post today and one post tomorrow! Thank you sooo much for your patience! Happy Reading and Enjoy!!!!!

Science fiction and fantasy are built on cool ideas and fascinating worlds — but those things are only as good as the people who live around and inside them. How do you create compelling fictional characters? It's a huge challenge. But here are some tips that might make it easier.
There's no silver bullet or easy formula for creating characters who live and breathe inside your head (and hopefully other people's heads, too). If there were, we'd all be using it and it wouldn't be such a nightmare. I struggle with this all the time — I'll have a story reach an eighth or ninth draft before I realize that a major character is still basically a scrap of paper, carried along through the story on the wind. And after years of grappling with this issue, I've come up with some things can help me to imagine the character as a real, separate individual instead of a function of the plot or story.
Note: this essay is adapted from a mini-lecture I gave at Clarion West a couple weeks ago. Thanks to everyone there who asked questions and gave feedback on it. (And this is a good place to plug Clarion West, which is an amazing writing program that you should all support and apply to. I had such an incredible experience there, and felt privileged to hang out with the next generation of mind-blowing SF writers.)
So here are some ideas and tips that might make your characters come to life more easily:


1) Character Is Action

This is the maxim that I've basically tried to live by for the past few years, and I kind of want to get it made into a banner that I can hang over my computer. Your characters can be witty and spout interesting philosophies, and have cool names and awesome fashion sense — but in the end, they are what they do. We judge people by their actions (with the caveat that speech can be an action, too.) So when you're coming up with characters to populate your world, don't think of types of people or cool ideas — try to think in terms of people who do stuff. And if your characters are just sitting around spouting witty one-liners for page after page, but not getting off their butts and doing something, then they're probably not such interesting characters after all. (And yes, even if you're writing a drawing-room novel in which conversation is the main event, that conversation should still involve people interacting in ways that move the story forward.)


2) Surprising Acts

And following on from that — the most compelling characters are often the ones who do something unexpected. And when you first create a character, you need a "hook" to get yourself interested in them — because a lot of creating a character is actually making yourself curious about him/her. You, the writer, have to want to know more about this person, and then you can make your reader want to know more, too. So one way to do that is to imagine a character who does something completely wild and goes off the map, something that nobody else would ever do. And then try to imagine what would motivate someone to behave that way, and what sort of person does that sort of thing.


3) Weird Contradictions

Again, a lot of inventing people, and having them take on a life of their own, is making yourself curious about them. And one thing that can make you wonder about someone is their personal contradictions — in real life, as well as fiction. When you meet a Vegan who wears leather, you want to know more about why they refuse to eat animal products but they wear animal skins. Or if you meet a Buddhist sadist, that's automatically fascinating. Those are somewhat extreme examples, but everybody has contradictions between their beliefs and actions, or between two different ideas they subscribe to.


4) One Detail Can Be Your Way In

If it's a vivid enough detail. Especially for a supporting character, a single striking detail (like a jewel that this person wears, or an odd habit they have) can make them stick in your mind. But even for your main character, a single interesting detail about her or his appearance, or a habit of speech (a catch-phrase?) can make them a lot more vivid to you. In a lot of ways, this is like trying to remember someone you used to know years ago — anything that brings them into focus in your head is helpful.


5) But Save The Extra Details For The Rewrites

When I was starting out as a fiction writer, I was in a workshop where someone handed out "character creation sheets" they'd printed out from somewhere. These weren't like D&D character sheets — there was no space for alignment or dexterity or whatever — but instead were just accumulations of details that would hopefully add up to a three-dimensional character. Favorite color, childhood pet, favorite music, etc. The one time I tried to fill out that sheet for a character, I lost interest in her before I got halfway through. It was too much clutter, and made me get bogged down in trying to invent stuff that I wasn't that interested in. On the other hand, one trick I've found really useful is to go back, in the ninth or tenth draft, and seed in more stuff like the character's taste in music, eating habits, taste in decorations — once the character is already living and breathing and the story is already written and polished, I often find adding stuff like that in just adds an extra layer of realness to the whole thing.

6) A Compelling World, And Someone At Odds With It

So you've already done some gangbuster worldbuilding, and created a setting that's a living, breathing place — and now the temptation is to fill it with people who fit perfectly with it. After all, the world is so fascinating, your characters should be an extension of it, right? Maybe not. Oftentimes, the most interesting character is the one who sticks out from the world, or is at right-angles to it. In a world of cloud-herders, write about the person who's allergic to vapor. Your protagonist doesn't have to be a social outcast, or someone who defies the society's norms and values — although that sure doesn't hurt — but writing about someone who has a unique relationship to your world is a good way to create fictional people with some life to them.


7) Yoda Was Wrong About Anger

Capturing emotion on the page can be really hard. There's an element of acting in writing — you have to "hear" your characters in your head, but you also have to "portray" what they're thinking and feeling. Sometimes, it's actually helpful to act out the scene (in the privacy of your own home) until it feels natural and true. But most writers are not great actors, and accessing emotions on command can be a nearly impossible task. Which is why anger is a godsend — everybody can get angry, and everybody has things that inspire anger pretty easily. And anger is a powerful emotion that can motivate your characters to do a lot of things. But also, anger can transform into other emotions really easily. Yoda was wrong: Anger leads to protectiveness. Anger leads to joy. Anger leads to forgiveness. Anger can easily turn into humor, in fact. If you can get in touch with your anger, you can find the ways that it turns into other strong emotions.


8) Your Character's Desire Can Be Extraneous

As a general rule, an interesting character is someone who wants something — people who don't want anything tend to be apathetic, and it's a lot harder to make audiences interested in an apathetic character. (It's totally doable, but at least be consciously aware that you're doing that, and try to make it work.) But what your character wants doesn't need to be the main point of the story — if your story is about someone being attacked by giant carnivorous mushrooms, your main character may want something more than just to avoid being eaten. Maybe your character is trying to make it to her wedding on time, and the giant mushrooms are just preventing her from getting to the church on time. That's a crude example — but if your story is about accomplishing one particular task, consider having your protagonist want something separate from that task. This will make him/her stand out and feel less like a walking plot device.


9) Write An Origin Story, Even If You Don't Use It

Not just where your character comes from, or who they used to be — but an actual story. It doesn't have to be more than a paragraph or two. Write the story of how your main character dropped out of high school, ten years before your story begins. Or the tale of how your protagonist first realized they were different. Sometimes writing a brief, snappy tale of how the character learned something or dealt with something, that turned them into the person they were at the start of your story, can give you a powerful little nugget to keep in your back pocket. I almost never include these "origin stories" in the actual finished story, but they help me see who this person is now, by imagining how they got here.


10) Work AGAINST The Flow Of The Plot Or Story

This sort of relates to point #8. If your character is going from A to B to C, following the exact steps they need to take to get through the plot you've laid out for them, then they're probably not actually having a life of their own. Your character should wander off the path — and pay attention to points where a real person wouldn't necessarily just walk straight into danger, or make the decision that will move the plot forward. Often times, when your plot is going too smoothly, it's not just because you haven't introduced enough complications — it's also because your characters aren't really making their own decisions. Real people will have their own agendas and qualms, and they won't just go where you need them to go. (And then, once your characters have completely screwed up the nice path you laid out for them, that's when your worldbuilding kicks in and prevents them from just doing whatever they feel like.)
Images via McClavertyUssatulejovikeLeo Boudreau and Hillebrand on Flickr.

Motivational Christmas Memory

Hello, fellow Art Warriors!      I want to write this blog not to talk to you as a blogger, but as a creative friend. Some of you are teen...